|
 |
|
|
I took my first job in the aircraft business in the Summer of 1956 at the age of 19 with The Boeing Airplane Company (as it was called then) as a machine tool designer/draftsman. I joined the U.S. Air Force in September of 1958 and returned to Boeing in the Summer of 1962 after my discharge. Subsequently, I worked for LearJet Corporation when they first opened in Wichita, and Cessna Aircraft Company as a Design Engineer. I left that phase of my "Aviation Career" in 1970. After working as an insurance agent and a professional photographer for a few years, because of the bad times in the aviation industry, I became a professional pilot.
During my aviation career I have been a part in the development of several prototype airplanes. I have for a long time wanted to build an airplane of my own. I start a project to build a wooden airplane in mid 1970 since I have been an avid wood worker since the age of 13 or 14. However, I had to abandon this project for various reasons.
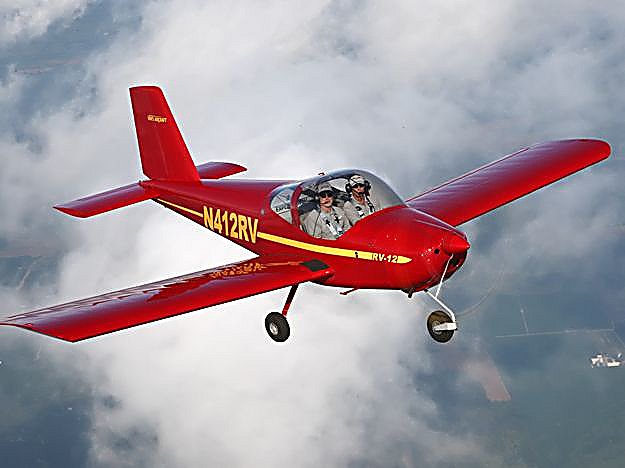
Last September , or so, I spotted an article in Kitplanes Magazine about Dick VanGrunsven's latest design the RV-12. What's an RV-12", you say? CLICK HERE. So, I went down to my computer to investigate further. Well, it was love at first sight. Donna, my wife of 50 years, was roaming around the house at the time and I called to her from the office. "How would you like to build an airplane", I asked as she stood in the office door? (I know she must have been thinking, "Oh no not again.") "Go for it", she said rather calmly, looking at a picture of the airplane on the screen.
I contacted Van's, scheduled a tour of their new facilities in Aurora, Oregon, and arranged a demo flight. I made some cheap airline reservations, and about a month later traveled to Oregon for a look. The afternoon of my arrival I ordered the wing kit. (Oh my God what am I doing!) The airplane is divided into five component kits:wings, fuselage, empennage, a finish kit, and the engine kit.
The wings arrived in two large crates on the 18 of December.
Choose a design that appeals to you aesthetically and one that you an use once it is built. These projects take a long time and these factors will go a long way oward maintaining your motivation during the process. This is very important.
Commit fully to the project. Include your wife and other members of the family. The airplane project will be around a long time and will require sacrifice from everybody in one form or another, and will cost a lot of money. Without commitment it will be uphill all the way.
I will say one thing in favor of the RV-12: I have worked in the aircraft business for a long time, and after completing the wings of my airplane I do not know how you could make an all metal airplane easier to build than this one!
I built a work table in my garage by constructing a frame out of two by fours and attaching to it a 4 x 8 sheet of MDF. This rests on two heavy duty saw horses that I built some time ago for woodworking projects.
My garage is not heated so I bought a 30 - 80,000 BTU propane heater ($99) which is more than adequate. In fact, it will run me out of the garage if the OAT is 40 F or above. It burns a lot of propane but it only needs to be on intermittently to keep the work area about 60 F. Works fine even on the coldest days.
There are some tools that are a must.
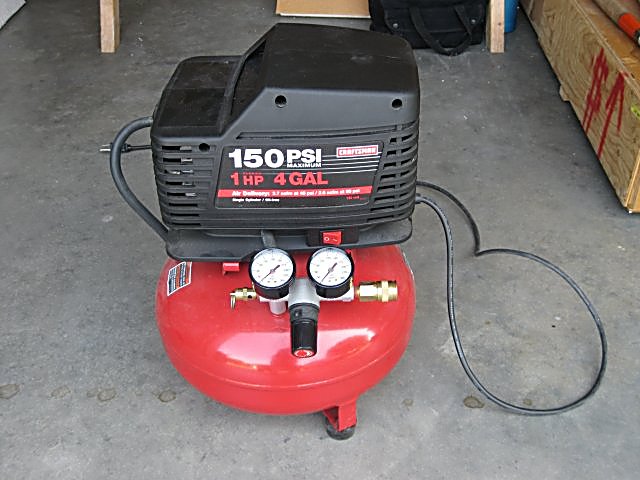 The first thing you will need is an air compressor to power the air various air tools you are going to need. I am using a small "pancake" compressor which I already had. I used it to power nail guns for my woodworking projects. Mine is 150psi and 4 gallons. (6 gallon capacity is better, and only slightly more expensive.) It works just fine to power tools like rivet pullers, rivet guns, and a small hand drill. These compressors are readily available just about everywhere that tools are sold (Lowe's, Sears, Home Depot, et al.) in a variety of capacities that will bogle the mind. If you intend to get involved with spray painting get a larger one, you will need it.
You will definitally need the above mentioned rivet puller. This tool is pneumatic/hydraulic powered. There is no way you will be able to install 15,000 rivets with a hand puller. However, You will also need a good quality mechanical hand puller. There are places the pneumatic/hydraulic puller will not go.
Riveting. The majority of the rivets used in the RV-12 are what are called POP rivets. They are simple to work with and give good consistant results. There are however, some conventional rivets used up to 1/8" in size. You can set the all of the conventional rivets used in the RV-12 structure with a rivet squeezer but I personally have not yet gotten to the point where I get very good results with this device except on the smaller size rivets. Get yourself an air powered rivet gun and a couple of bucking bars and learn to drive the conventional rivets in this way. You can find sets that include a rivet gun, two or three common size bucking bars, and two or three common sizes of rivet sets for under $250. Practice a little with the rivet gun and bucking bars until you feel comfortable with the process before trying it for real. It's easy to learn and you will probably feel more satisfied with the results as I was.
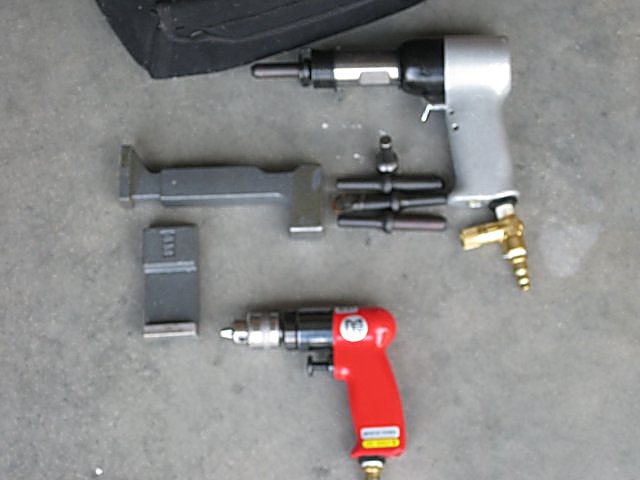 Drilling. You will need to purchase an air powered hand drill like the one shown in the above photo. These air powered drills turn at a much faster speed than, say, your 19.2 volt drill from Sears. When drilling soft metal like aluminum you need this higher speed. (The softer the material, the higher the speed.) Your cordless is alright for some things but it's a compromise. Air powered drills come in small sizes called palm drills or the larger variety. They come in one way or reversible. Your choice. Shop around, they start at around $140. You will need one.
There are a few other specialized tools you will need or want. You will need a tube bender. The tubing in the RV-12 are 1/4 inch an d 3/8 inch. I bought a hand bender at Harbor Freight for $12.00. It accepted three sizes of tube and worked it worked just fine. You will need a tube flaring tool . These are kind of expensive (about $100.00) but a good quality one is a must. You won't have to a lot of this but you wil have to fabricate a few tubes for the fuel system, so it must be done right. You are going to want to brake the edges of some of the skins. This requires a special tool to do it right so that the skin joints look good on the finished product ($35.00).
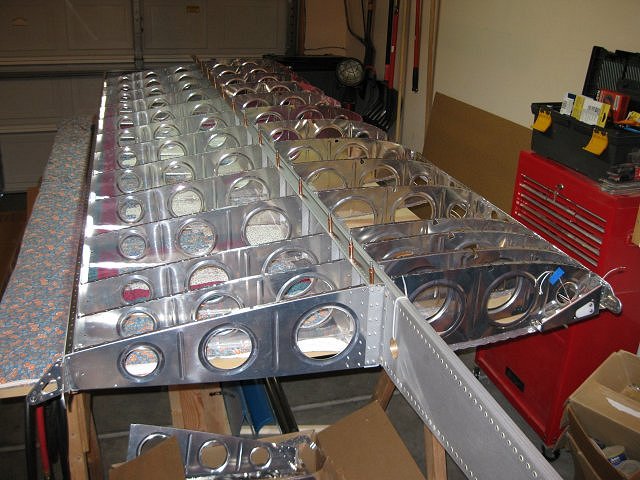 The RV-12 is, of course a kit plane. As such, at least with Van's it is designed on computer, so, when you build the wing skeleton (spars and ribs) as shown, then apply the skin, the holes line up perfectly because the computer knows precisely where each hole is. In addition, all of the holes are pre-drilled to size. All the builder has to do is deburr them and rivet.
The RV-12 comes in a series of individual kits. I started with the wings because, at the time, the Fall of 2008, this kit was the first available. This kit was somewhat involved and took the better part of 2009 to complete. I had to learn some new skills in the process and I made a few mistakes which cost not only a little extra money but some time as well. Attacked by the learning curve you might say. If I were to build an RV-12 today I would not start with the wings because they had to be put off to the side and stored for a long time and took up a lot of valuable work space. Later the were moved to rented storage unit until the fuselage was complete.
A SHOT OF THE WING SKELETON PRIOR TO SKINNING.
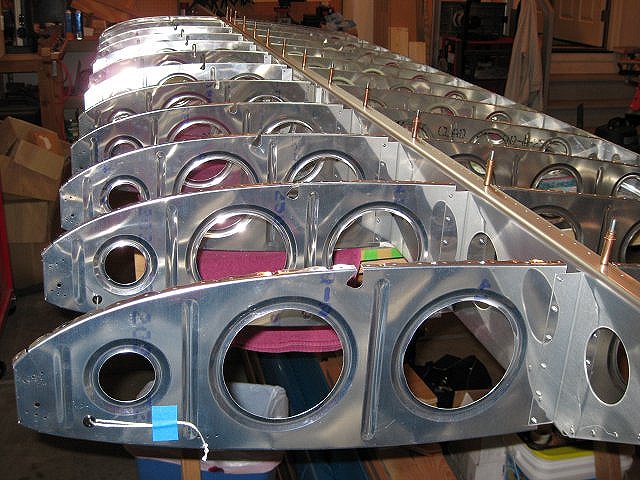
A PICTURE OF THE WING LEADING EDGE STRUCTURE.
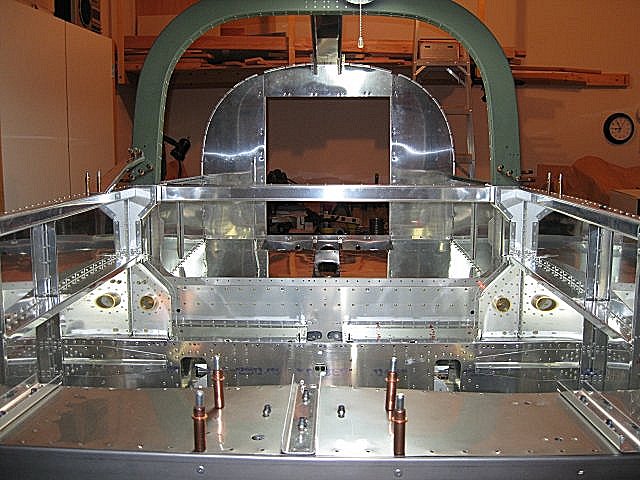
A VIEW OF THE FUSELAGE CENTER SECION LOOKING AFT.
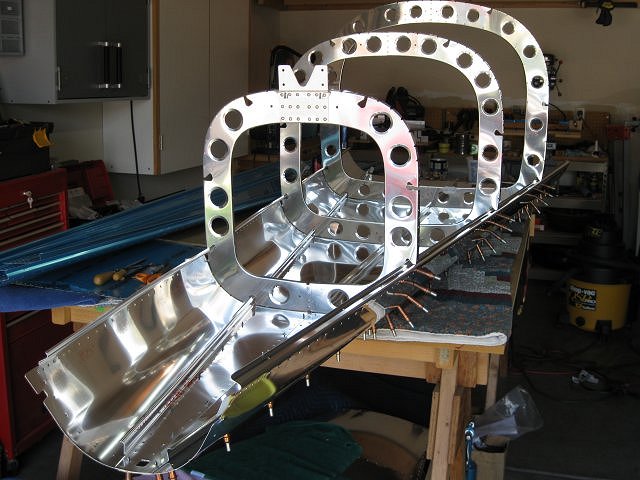
THE TAILCONE, JUST GETTING STARTED.
The date April 3, 2011. I know, big gap in the update, but it's been a busy and cold winter here in the heartland.
All of the structure is complete, now for the systems. The fuselage in on it's side on the work table and will probably be that way for a while during the next stage of construcion, the systems; fuel systems, control systems, and electrical systems. During the winter I worked on the rudder pedal/brake assembly. Now that spring has arrived, for the fourth time and I am able to work in the garage again I am now working on the fuel system. Pretty straight forward, not complcated but some new skills to learn like tube flaring and tube bending.
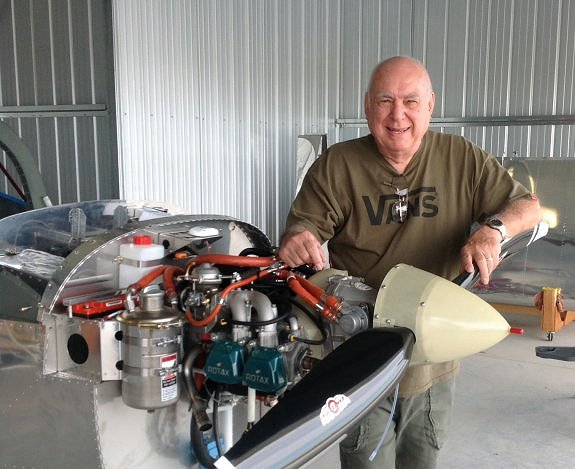
I received what's called the Finish Kit from Van's the first week in March which includes the fiberglas cowling, the landing gear and brakes, the canopy, the control system parts, and the electrical system components. This should keep me busy for a while.
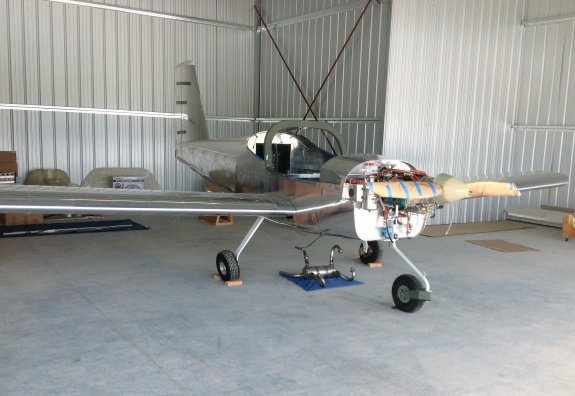
 The date now August 2014. Well it's been a really long time since the last update.Indeed the finish kit keep me busy for quite a while. A couple of months ago the airplane and all it's parts were move to a hangar at a nearby airport for final assembly. Below is a picture with the wings on for the first time. Kinda even looks like an airplane doesn't it? Underneath the airplane is the exhaust system which was installed on the engine last Monday, Labor Day 2014, proof that I continue to make headway.
The plan now is to put the finishing touches on the electrical system, then reinstall the control system, which I had to remove to complete modifications made when Van's changed the avionics system to a new system which includes larger EFIS tubes and synthetic vision. Then I will be able to re-install the wings, mount the horizontal tail, and the rig the control system. I will then be ready for the first rolex replica watches engine run. When will that be? Well, when I get done with the aformentioned tasks. Building an airplane consists of completing a million little tasks, when all the tasks are done you fly. Hopefully when all of the tasks are done you don't have any parts left over.